


Let’s pick up where we left off, and talk more about Drip Marketing. But this time, more specifically about how you can set up truly effective email drip campaigns. In the last post, we discussed at length about what exactly drip marketing entails and several examples to inspire your own nurturing campaigns.
But as Frank Herbert said, [perfectpullquote align=”full” cite=”” link=”” color=”” class=”” size=””]“Ideas are a dime a dozen. It’s the execution that counts.”[/perfectpullquote]
So, let’s talk execution.
If this is your first time using drip email campaigns to nurture your leads, you might think it’s going to be a daunting task. But, it doesn’t have to be. All you need to do is follow these simple rules, map out the path you want the leads to take, and you’re good to go!
How to Set up an Email Drip Campaign?
So before we start, let me make the process easier to visualize, and therefore easier to apply to your own business.
Imagine that you are an e-learning platform. You offer a variety of courses to a huge audience. Your courses include technology, history, programming languages, business studies and also other fun stuff like guitar classes, crochet, glass painting and baking.
What with Christmas just around the corner, your baking class instructor has a bright idea! Why don’t we teach a course on how to make a classic Christmas cake!

You love the idea, and now you need to get people to sign up for these classes. You’ve decided that a Email Drip Campaign is the way to go and now you need to set it up.
Let’s get started then!
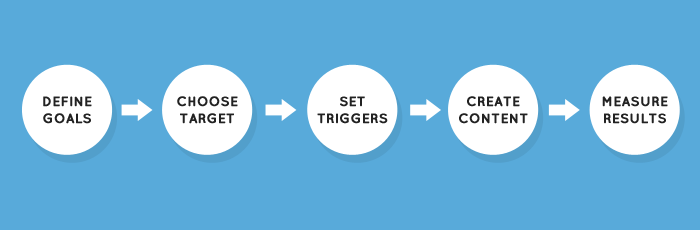
Step 1: Define your goals
What’s the aim of your email drip campaign – that’s the first question you always need to ask? In this case, the goal is to get sign ups for your new baking class. It is as simple and straightforward as that. All you have to do now, is to give your existing students that nudge to sign up for your course.

Apply the same rule to your nurturing goal. What do you want your prospects to do?
Do you want them to book a new vacation package from you? Do you want them to buy your software? Do you want them to review your product? Do you want them to refer you to their friends?
Once your goal is identified, it is easier to figure out the nurturing process you have to set up, and to measure the success of the drip email campaign.
Step 2: Choose your target audience
These are the people who get your emails. So who’s most likely to sign up for a Christmas special baking class? The people who are already enrolled for your regular baking classes, of course! Now you can simply choose the list and send them an email about the new class. (A tool that lets you set up your drip email campaigns by making this segmentation easy is the key here).
That does not mean that those who have signed up for other classes won’t be interested. Maybe, they want to bake the cake to surprise their friends and family. Or maybe baking a cake was on their to-do list this year! By not targeting them, you might actually lose out on more business.
So, you can create different target lists by using different segmentation criteria (you need to make the differentiation, because the actual content for the emails might vary depending on the bucket they belong to).
Target list 1: People who have signed up for baking classes
Target list 2: People who have signed up for extra-curricular courses (more than 2)
Target list 3: People who have signed up for at least three courses from different categories.
Target list 4: Everyone who has ever signed up for any course on your platform
You now have different targets that will get the initial email. But how do you gauge their level of interest? How do you know who will sign up, from the 10,000 people who received your email?
That brings us to the next step.
Step 3: Choose your trigger event
When I started out, I had a lot of difficulty differentiating between the target and the trigger. A person performing a desired activity is my target, but the activity he performed is my trigger. How do you differentiate between the two?
Think of it this way. To send out a campaign, a target is essential. The trigger you set just helps you make the communication more personal.
So you have already sent out an email to your target audience announcing the class. Now you can personalize your communication by setting up triggers. For example,
Trigger 1: Target opened email, but didn’t click on the link
Trigger 2: Target opened the email, clicked on the link, but did not fill the form.
You get the gist? So based on their actions you know their likelihood of signing up. A person who opened the email was just curious, and you can further their curiosity by sending them an offer. Whereas, the one who clicked on the mail might actually be closer to conversion, and a gentle nudge would push them further.
Now you that you know their psyche, it’s more easier to reach out to them, no?
Step 4: Create the content and structure
This step is all about what you are going to be saying to them and when you are going to be saying it to them. Which makes it the most important step in the handbook.
You need to figure out the structure in which the message will flow. It should look something like this:
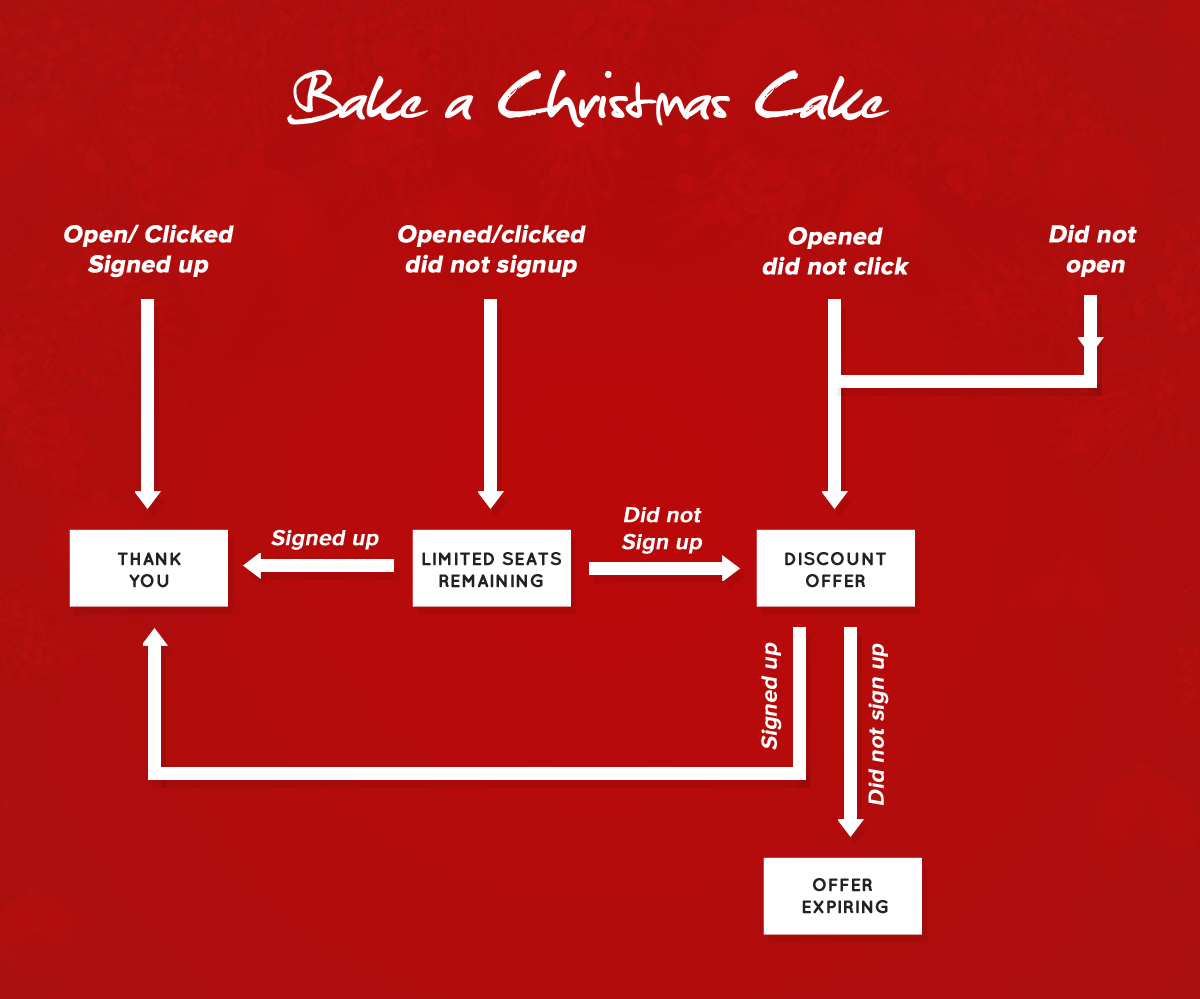
The structure makes the whole process easier to set up. What message to give whom, when they do what. Setting multiple triggers makes for more personalized messaging.
Imagine getting a mail that says,
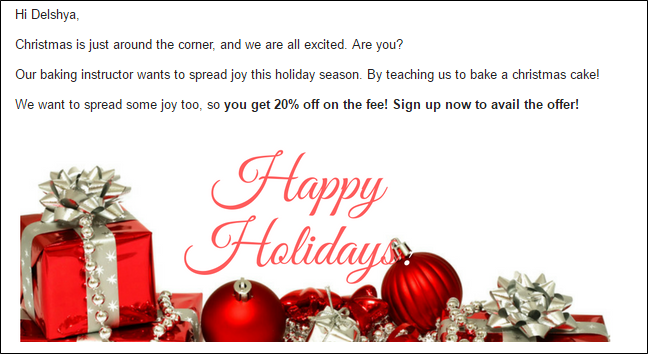
I would definitely be interested, or at least intrigued!
So remember that the content you send matters. It’s what will ultimately engage the customer. Your email marketing best practices apply here as well. You wouldn’t want your well planned out email drip campaign to end up in their spam.
Step 5: Measure the campaign results
No point in putting this much effort if there is nothing to show for it. As you have already defined your goals, it is now time to measure the outcome. Look at how many people eventually ended up paying for the baking class, and the success of the campaign lies right there.
Constantly measuring your click rates and open rates, will also tell you how your content is performing. You can then tweak around the message, subject lines and layout of the mail to increase engagement. Once you have achieved your results, pop that champagne and give yourself a pat on the back!
Don’t forget to get yourself a good tool that will make executing your ideas much easier! A marketing automation software can help you set up email drip campaigns of these kind very easily!
Now that you have the handbook, it should be easier to set up your Drip Email Campaigns. Keep nurturing your leads and let me know in the comment section how it worked for you!
Happy holidays from LeadSquared!


